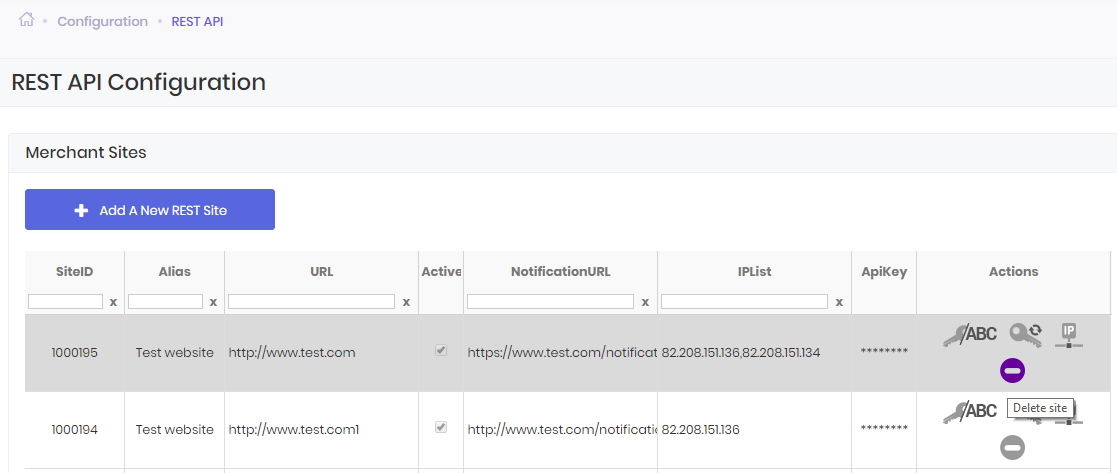
REST API Configuration

In the Configuration section, the user can add and configure multiple websites for his account (REST API tab), set up his preferred payment methods to use (Payment Methods tab), and choose the look and feel of the payment page (User Interface tab).

Once you login to your Dashboard Account go to Configuration tab -> REST API, where you will be able to add and configure multiple websites.

You can have multiple websites from where you can initiate payments to GlobalPay system, each website having its own SiteID parameter.

The SiteID parameter will be generated by our system and it will allow us to identify the location from where the payment was initiated and the URL where we will notify you of the payment status. By using this parameter, you will be allowed to manage multiple websites under the same merchant account.

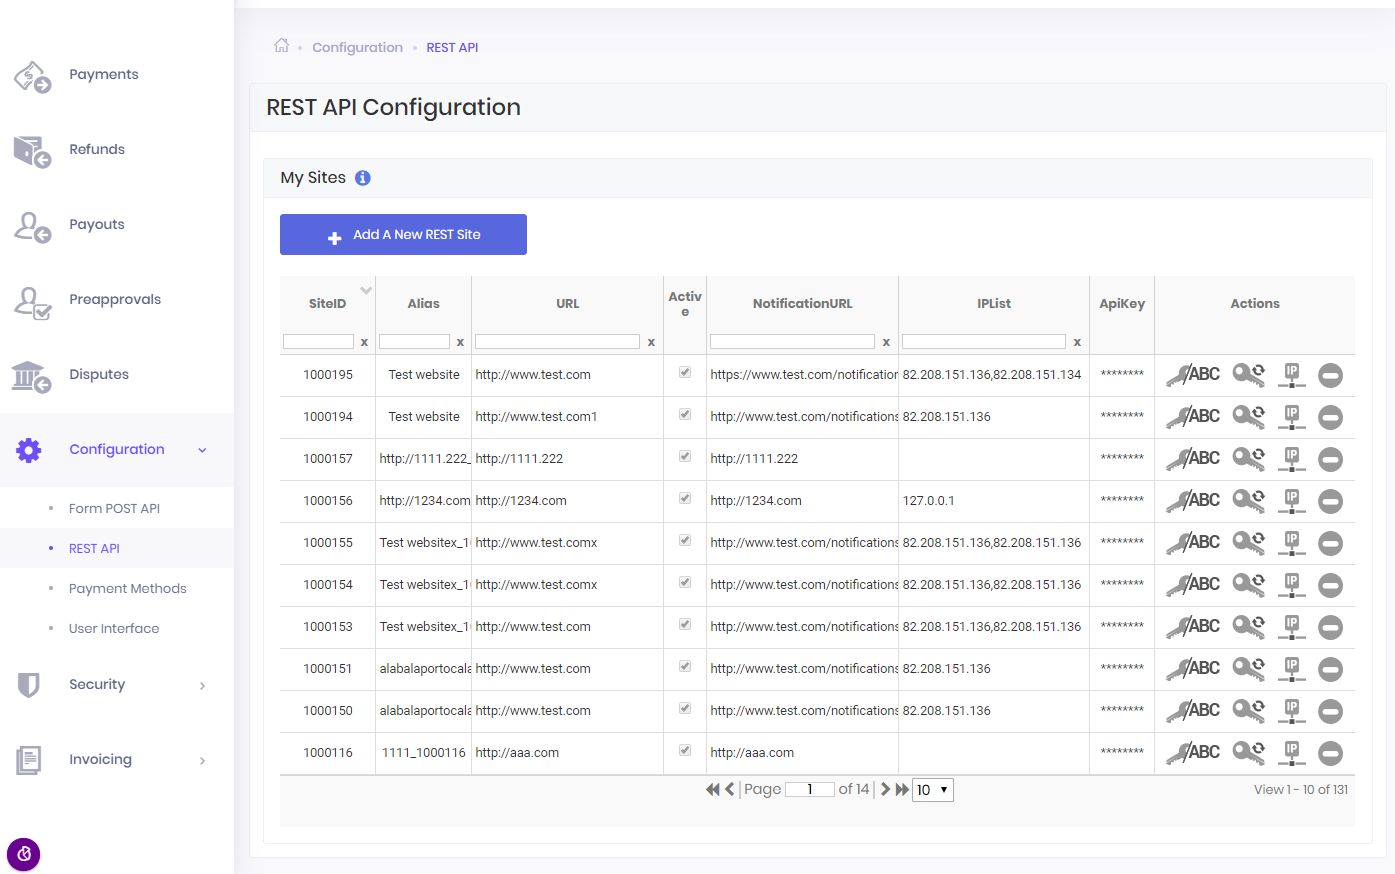
You can configure the SiteIDs from the REST API Configuration tab in the Configuration section.

1 Merchant Sites Configuration

You can also use various filters in order to easily identify each website, like: SiteID, Alias, URL, NotificationURL and IPlist.

1 Search filters

Four possible actions can be performed for a website using the following buttons from the Actions column: 27 Show ApiKey, 26 Generate New API Key, 24 Set IPs and 29 Delete site.

Add Website

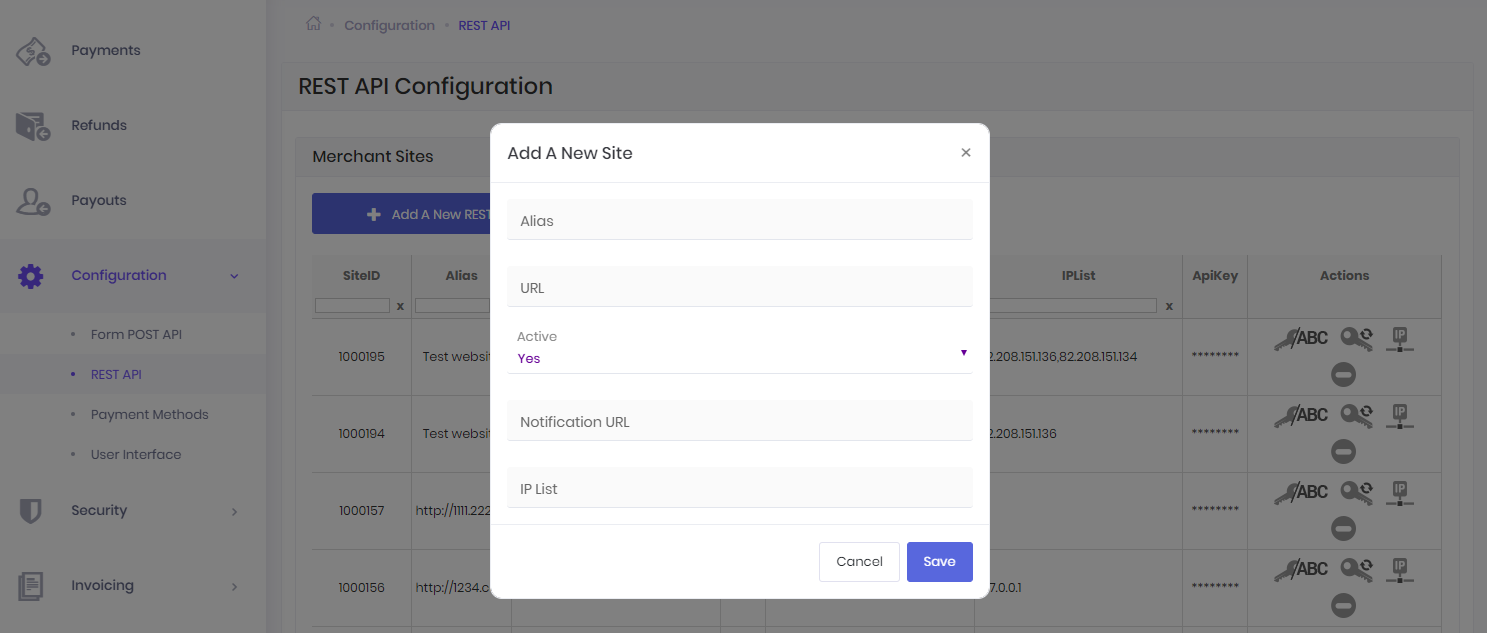
In order for you to add a new website you need to click on the Add a New Site button. A new window will appear and you need to enter the Alias for your site (an alternative name that identifies the website in the GlobalPay system), the URL of your site, the Notification URL where you want to receive the notifications for the payments initiated from that website, and the IP List. After you entered a valid URL, a Notification URL and an Alias, press OK and a SiteID will be generated for you.

1 Add a new site

Generate API Key

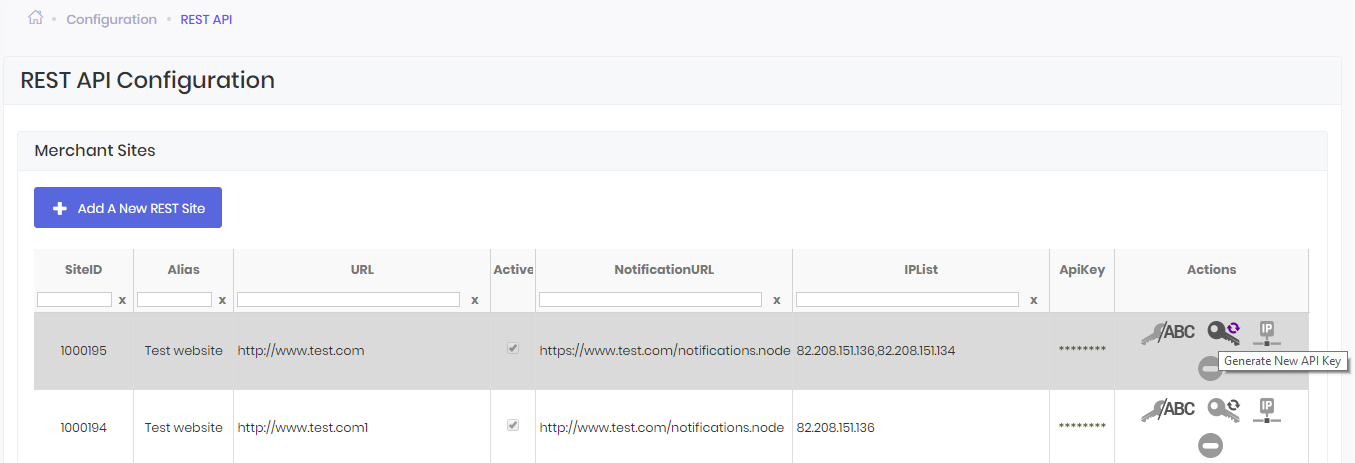
After the creation of the new merchant site, no API Key is generated for the new SiteID. In order to generate a new API Key, you need to press the Generate New API Key button 26 from the Actions column of your new SiteID. You can see the generated API Key by pressing the Show API Key button 27.

Please make sure the API Keys are kept secret and regenerate at once if security has been compromised! It is recommended to use a different API Key for each SiteID to authenticate to the REST API.

Once an API Key for the SiteID is generated, this is the API Key used to authenticate to REST API for each payment initiated from that website and for each notification send to the NotificationURL set for that website.

1 Reset API Key

The API Key is an important part of the payment flow; it is used to authenticate to the REST API. For more information, please visit our Authentication section.

Set IPs

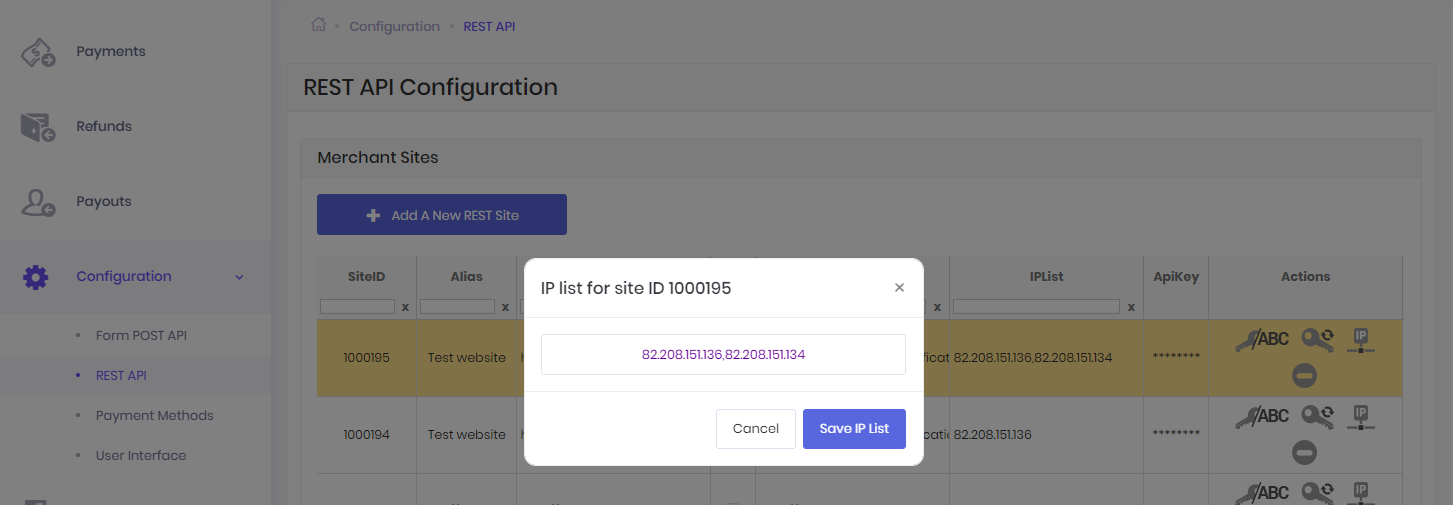
You can configure the IPs for each SiteID from the REST API Configuration section in the Actions column. In order for you to whitelist your IP you need to click on the Set IPs button 24 in the Actions column. A new window will appear and you need to enter a valid IP. After you enter the IP press the OK button.

Set IPs