The UIConfiguration tab from Merchant Dashboard is your tool to configure the look and feel of the payment page.
In order to create or edit new skins or change the merchant logo, you need to have assigned a role with at least the following access rights: UIConfiguration-View and UIConfiguration-Update.
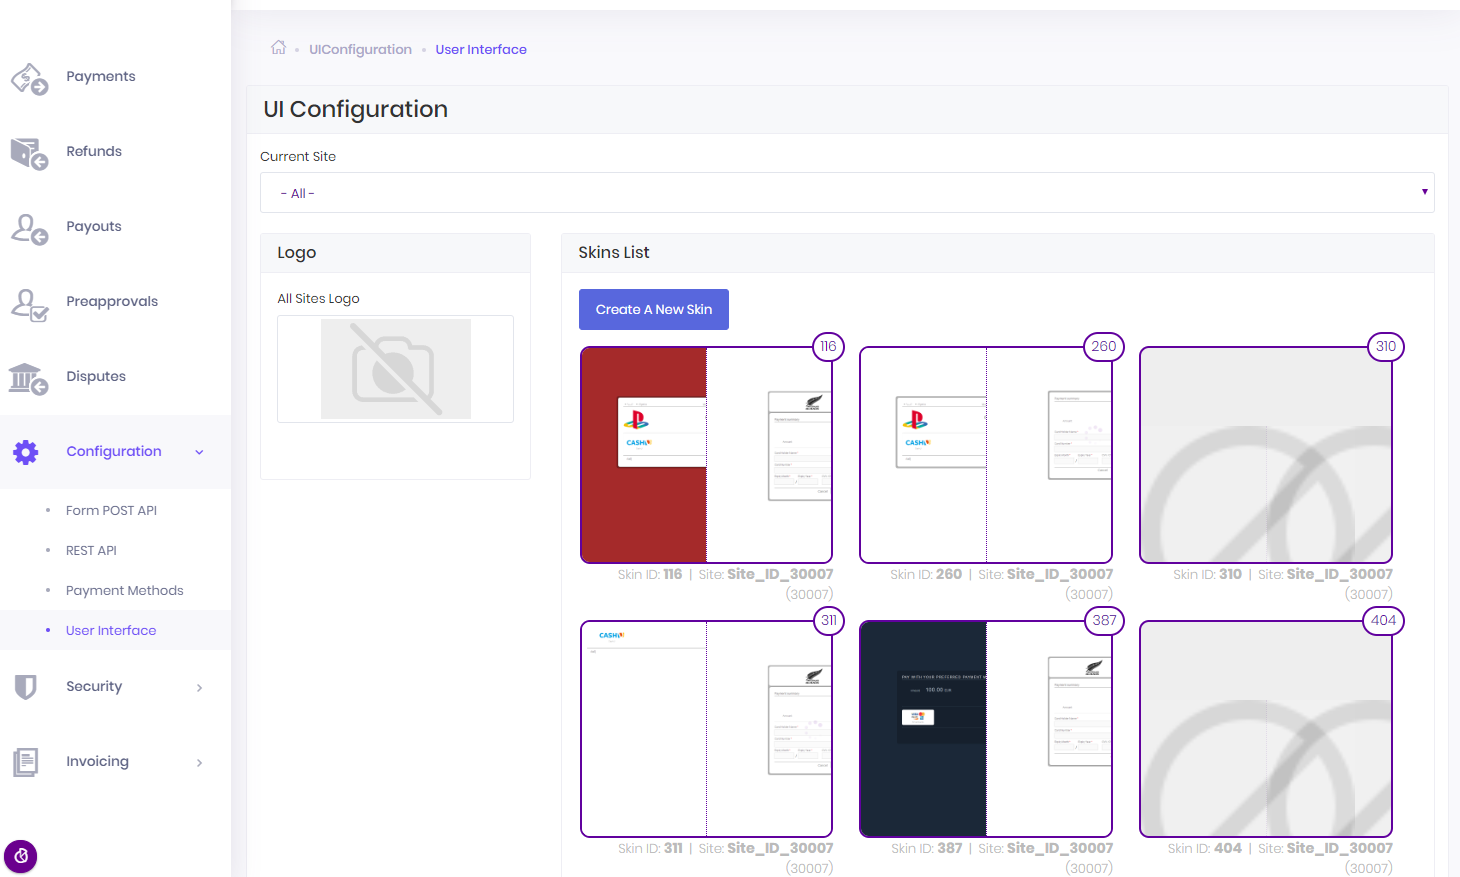
When you access the UIConfiguration tab you will see a complete list with the skins of all the websites assigned to your account.
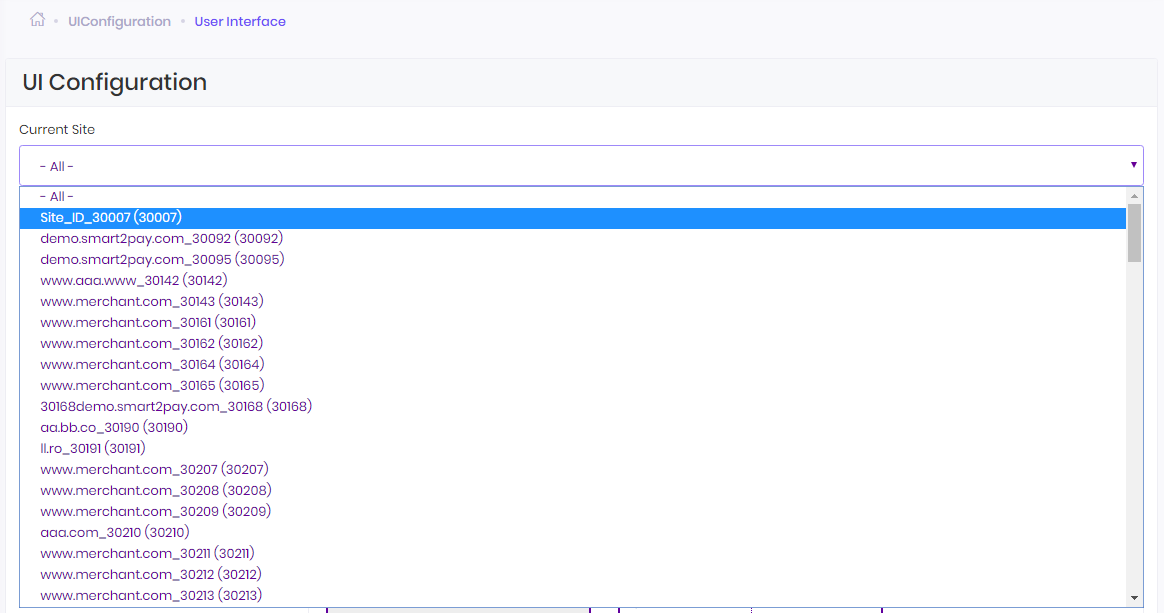
Select Site
You have the possibility to select a specific website using the Current Site drop down list, in order to view the skins assigned to it.
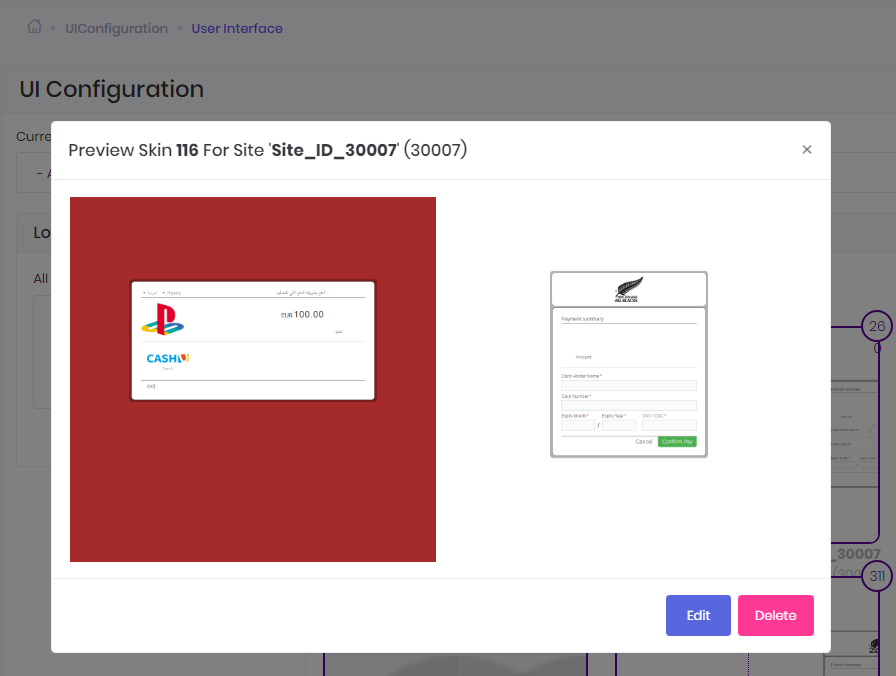
After selecting the required website you can view the skin by using the Preview function. You can see the ID of the skin in the top-right (e.g. 116) and the possible actions available on a skin: Preview, Edit and Delete. By sending in the initial post SkinId=116, the new skin will be used for the current payment.
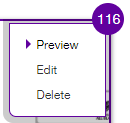
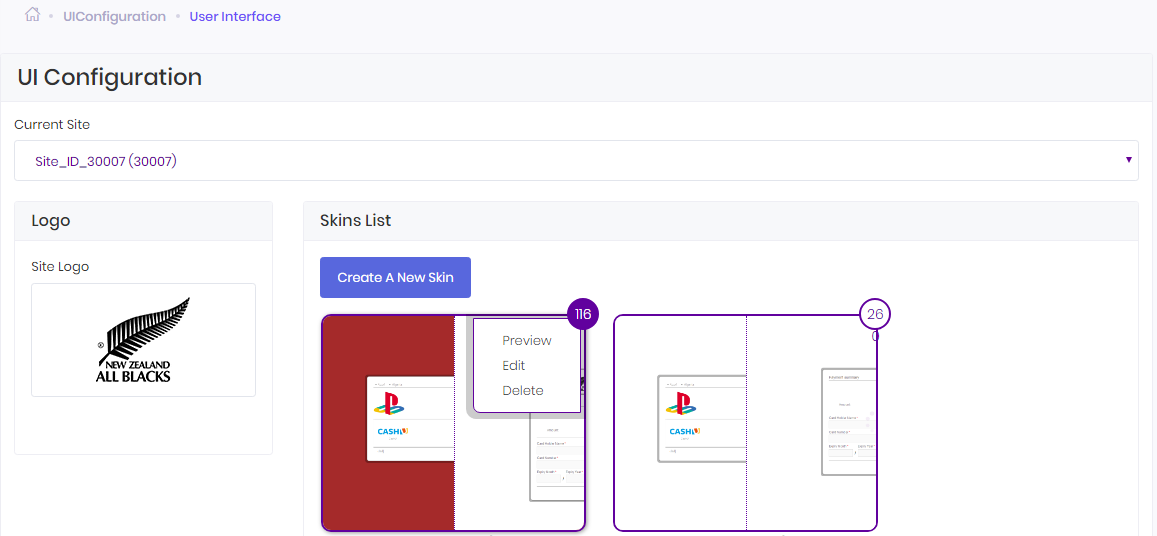
After you select the Preview state, the possible actions available for a specific skin are: Edit and Delete.
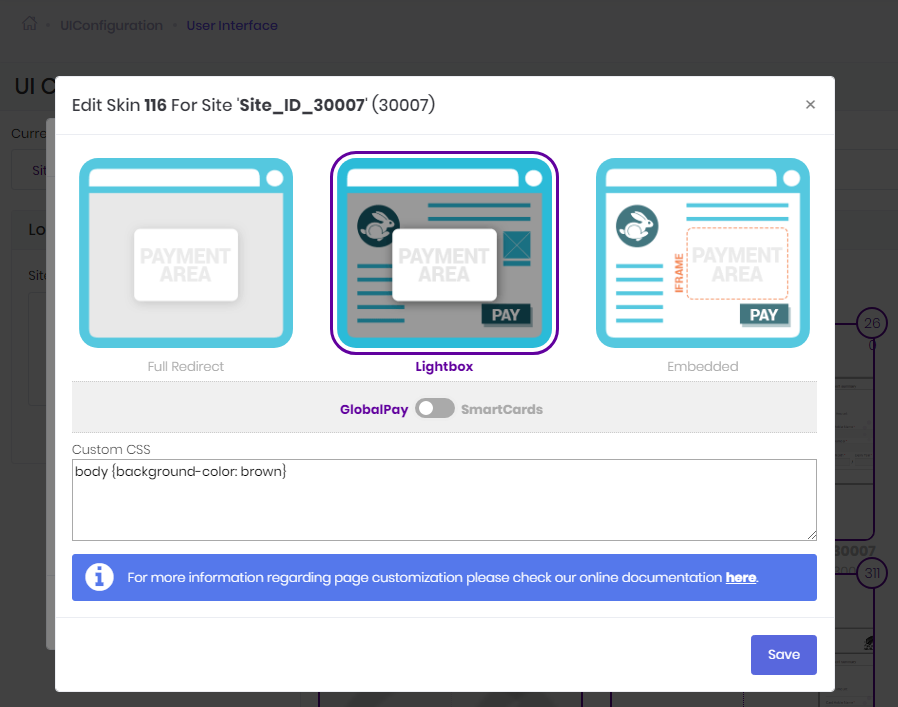
Edit Skin
You have the option to display the payment page with full redirect (in a standalone page), in a lightbox on top of your website or in an IFrame embedded in your website. You can also add custom CSS code to change other components of the payment page. For more information regarding payment page customization, check our dedicated section here.
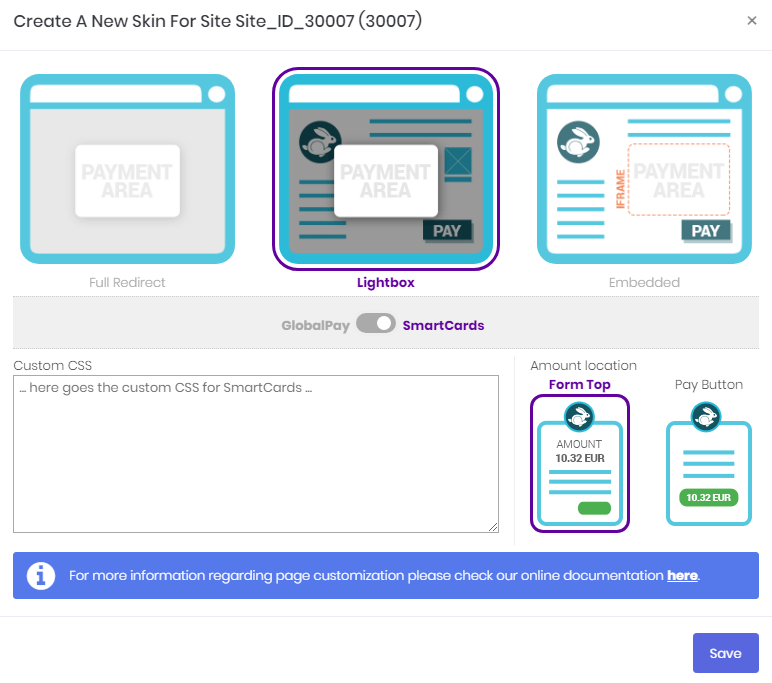
Create a Skin
The skins are created in the UIConfiguration page by clicking Create a Skin button.
You have the possibility to create a new skin for GlobalPay system, choosing to display the payment page with full redirect (in a standalone page), in a lightbox on top of your website or in an IFrame embedded in your website and you can add custom CSS code to change other components of the payment page.
You can dynamically instruct GlobalPay to display a certain skin, by specifying in the initial POST a value for the SkinID parameter. For more information, check our section Hosted Payment Page Skinning.
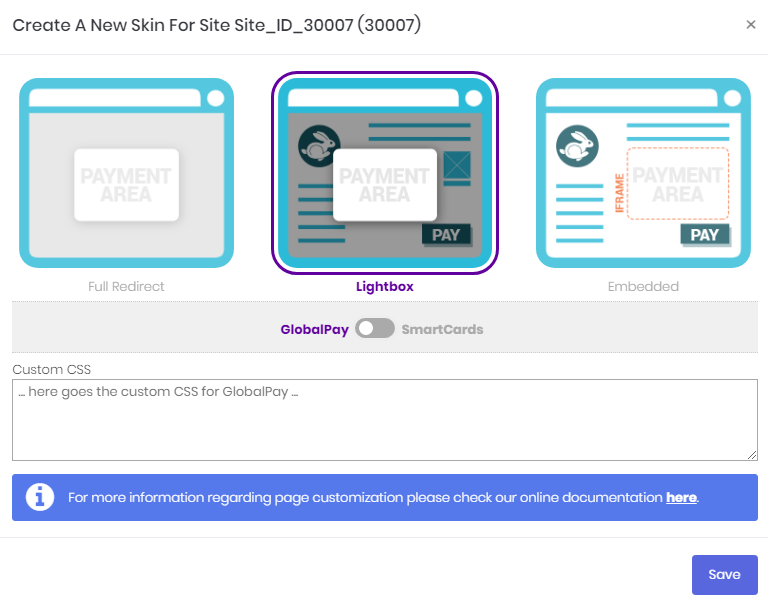
You have the possibility to create a new skin for SmartCards system, choosing to display the payment page with full redirect (in a standalone page), in a lightbox on top of your website or in an IFrame embedded in your website and adding custom CSS code to change other components of the payment page. Also you can choose the amount’s location inside the form: Form Top or Pay Button.
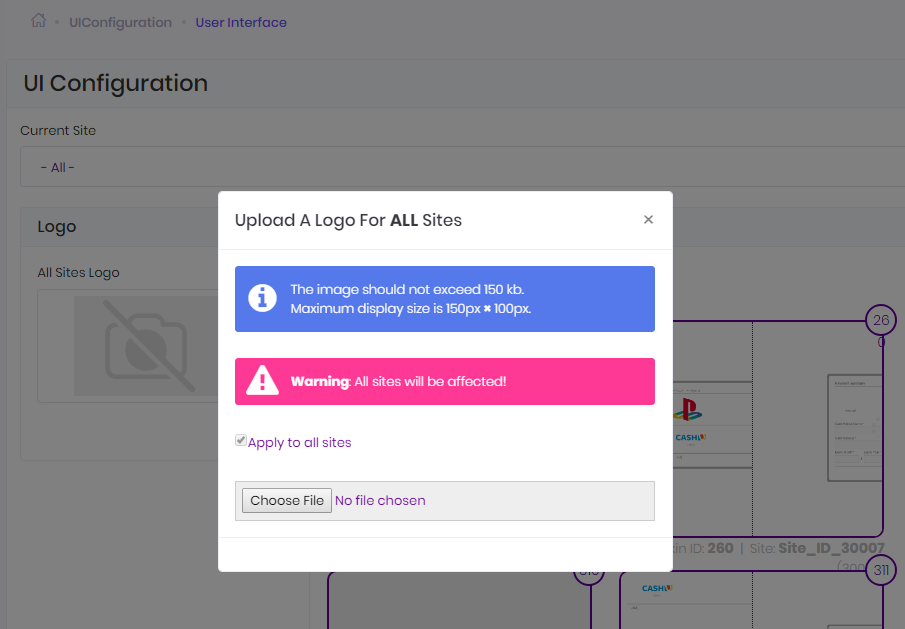
Upload All Sites Logo
You can upload a logo that the customers will see on the payment page and that will apply to all the websites assigned to your account:
- select All from the Current Site drop down list;
- go to All Sites Logo default picture and use the Upload button;
- click Choose File, navigate to where the logo is stored on your disk, select the logo, click the Open button in the File Upload modal window;
- click on the Upload button.
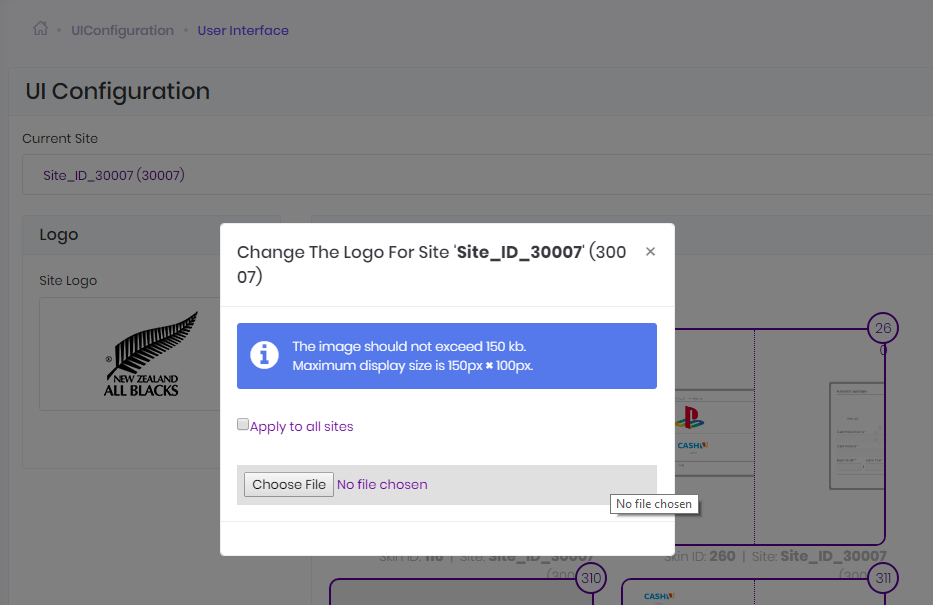
Change Site Logo
You can also change the current logo for a specific website. For a new logo that will apply only for that specific website:
- select the desired website using the Current Site drop down list;
- go to Site Logo picture and click on the Change button;
- click Choose File, navigate to where the logo is stored on your disk, select the logo, click the Open button in the File Upload modal window;
- click on the Upload button.
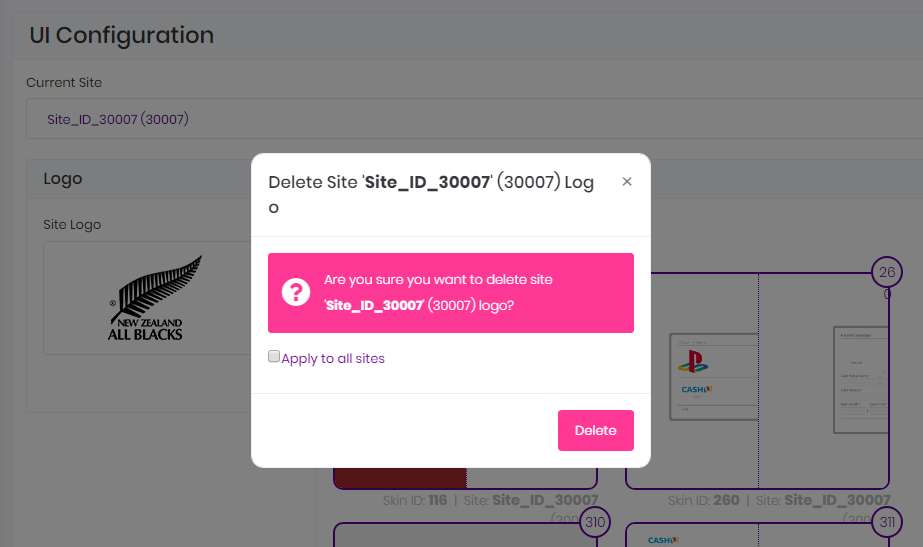
Delete Site Logo
To delete an existing logo for a specific website:
- select the desired website using the Current Site drop down list;
- go to the Site Logo picture and click on the Delete button.